Conquer Your Inbox: A Step-by-Step Tutorial for Organizing Gmail
Is your Gmail inbox a chaotic landscape of unread messages, promotional clutter, and buried important emails? With a little strategic organization, you can transform your Gmail into a streamlined and efficient tool.
Step 1: Archiving Emails
Before you can organize, you need to declutter. The goal here is not to delete everything, but to clear the slate. For any email that you’ve dealt with or doesn’t require immediate action, archive it. Archiving removes emails from your inbox but keeps them safely stored and searchable for future reference.
- To archive a single email: Hover over the message and click the “Archive” icon (it looks like a box with a downward-pointing arrow).
- To archive multiple emails: Select the emails you want to archive by checking the boxes next to them. Then, click the “Archive” button at the top of your inbox.
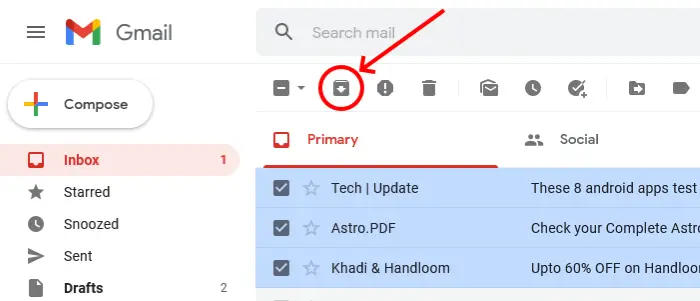
Screen shot: Archiving mails.
Step 2: Embrace the Power of Labels
Think of labels as folders, but better. You can apply multiple labels to a single email, allowing for a more flexible and powerful organizational system.
- Create a new label: In the left-hand menu, scroll down and click “More,” then “Create new label.” Give your label a descriptive name (e.g., “Work,” “Personal,” “Projects,” “Receipts”, “Flight Tickets”, “AC Warranty”, “House Loan”). You can even nest labels under broader categories.
- Apply a label: Select an email and click the “Labels” icon (it looks like a tag) at the top.
Pro-Tip: Color-code your labels to make them instantly recognizable. Hover over a label, click the three dots that appear, and choose a color.
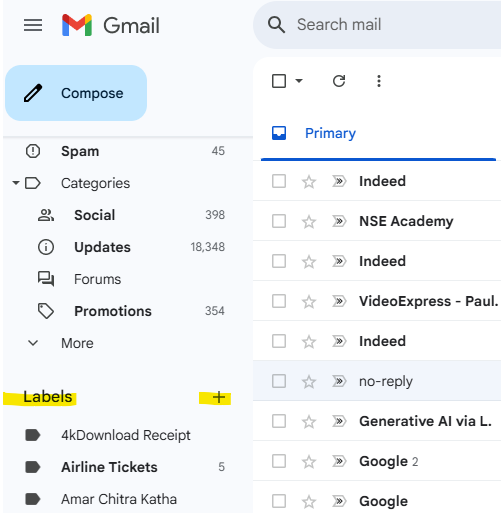
Screenshot: Creating Labels.
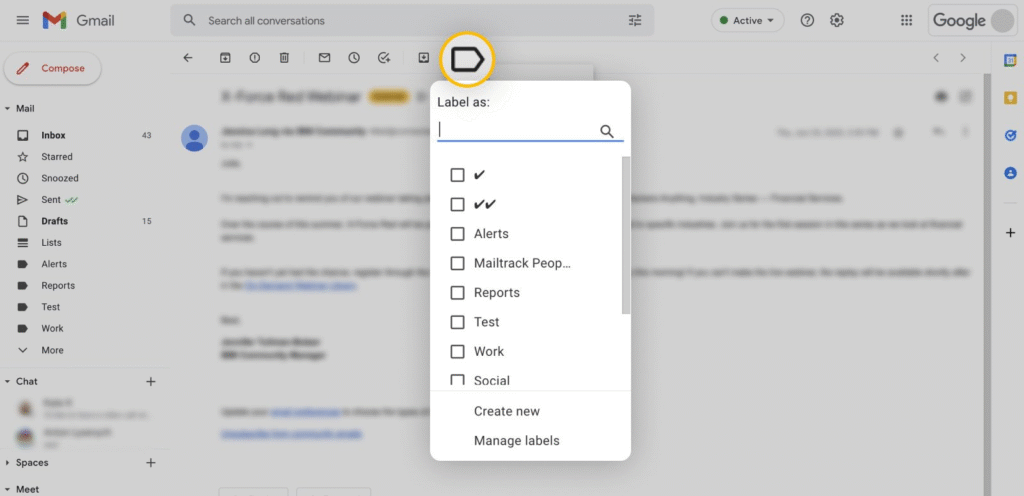
Screenshot: Adding Label to an email
Step 3 : Automate with filters
This is where the magic happens. Filters automatically perform actions on incoming emails based on criteria you set. This is your key to keeping your inbox clean without constant manual effort.
- Create a filter from a message: Open an email from a sender you want to filter (e.g., a newsletter, a specific client). Click the three dots in the top right corner of the message and select “Filter messages like these.”
- Create a filter from search: Click the downward arrow in the search bar at the top of Gmail. Here you can set criteria based on the sender, subject, keywords, and more.
- Define the action: Once you’ve set your criteria, click “Create filter.” Now, choose what you want Gmail to do with these emails. Popular actions include:
- Skip the Inbox (Archive it): This is perfect for newsletters or notifications you want to read later but don’t need cluttering your primary view.
- Apply the label: Automatically categorize your emails as they arrive.
- Mark as read: For emails you want to keep but don’t need to read immediately.
- Star it: For emails from important senders.
Step 4: Master the Search Bar
Don’t underestimate the power of Gmail’s search functionality. Instead of scrolling endlessly, use advanced search operators to find exactly what you’re looking for in seconds.
from:: Find emails from a specific sender (e.g.,from:john.doe@example.com).to:: Find emails sent to a specific recipient.subject:: Search for words in the subject line.has:attachment: Find all emails with attachments.is:unread: See all your unread emails.label:: Search within a specific label (e.g.,label:work).
You can combine these operators for even more precise searches.
Step 5: Adopt the “Inbox Zero” Mentality
“Inbox Zero” isn’t about having zero emails in your account; it’s about spending zero time with your inbox open. The goal is to process your emails efficiently and get back to your day.
Here’s the basic workflow:
- Set aside specific times to check your email rather than reacting to every new notification.
- When you open your inbox, process each email immediately using the “Four D’s”:
- Delete: If it’s junk or irrelevant, get rid of it.
- Do: If it takes less than two minutes to reply or complete the task, do it right away and then archive the email.
- Delegate: If it’s someone else’s responsibility, forward it to them and archive it.
- Defer: If it requires more time or action later, apply a “To-Do” or “Follow-Up” label and archive it. You can also use Gmail’s “Snooze” feature to have the email reappear in your inbox at a later time.
By following these five steps, you’ll be well on your way to a more organized and less stressful relationship with your Gmail. It may take some initial effort to set up your system, but the long-term payoff in terms of time and mental clarity is well worth it. Take back control of your inbox, one organized email at a time.
Videos:
Tip: To watch captions in Indian regional languages, Do This –>
Play the video, click on CC (on bottom right). Then click on settings icon (again on bottom right). Select “subtitles CC” –> Translate –> Select your language (for example Hindi)
Video : Creating Labels and Searching mails
Video : Creating Filters and Rules